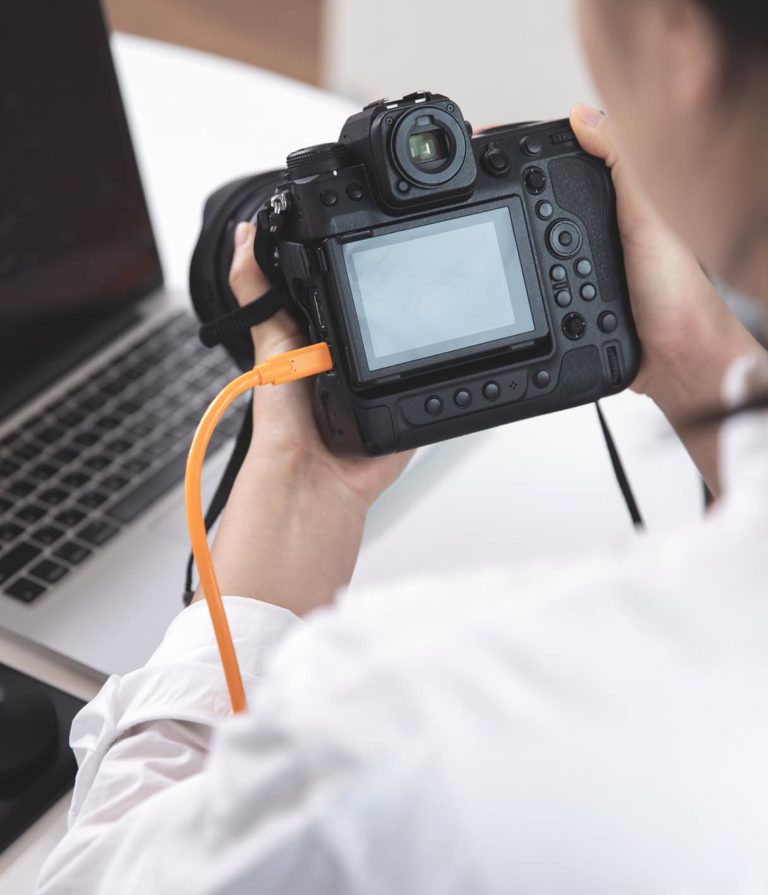
When I first got my hands on a Canon 100mm f/2.8 macro lens, it felt like opening the door to a whole new perspective. Suddenly, the world of food photography — with all its textures, colors, and intricate details — felt much closer and more accessible. It quickly became a game-changer for me.
Jump to:
Macro food photography isn’t just about taking close-up shots; it’s about revealing details that often go unnoticed, turning everyday foods into visually striking subjects. But like any specialized style of photography, it comes with its own set of challenges — from understanding the technical aspects to working with light in a way that highlights those tiny details.
In this article, I’ll explore the essentials of macro food photography through 21 practical tips, covering why a good macro lens matters, and how understanding concepts like minimum focusing distance and plane of focus can make a big difference in your images.
Plus, I’ll also touch on choosing the right subjects and why a tripod can be incredibly helpful when working up close. Whether you’re just starting out or looking to refine your skills, this guide will walk you through the key ideas to help your macro food photography stand out.
1. Embrace the Power of a Good Macro Lens

When I first dived into macro food photography, I quickly realized something important: a good macro lens isn’t just nice to have — it’s essential. My Canon 100mm f/2.8 lens quickly became my go-to tool, allowing me to capture the textures, colors, and tiny details that often go unnoticed.
Why You Absolutely Need a Macro Lens
- Get Up Close and Personal: A macro lens lets you capture the tiny details invisible to the naked eye. We’re talking about the texture, color, and soul of your food subjects. This closeness is what makes food photography truly captivating.
- Unmatched Sharpness and Detail: Imagine capturing the sparkle of sugar on a cookie, or the delicate patterns on a strawberry. That’s the magic of a macro lens. It brings out the depth and dimension that make your photos pop.
Yes, It’s an Investment. And Yes, It’s Worth It.
Let’s not beat around the bush: good macro lenses aren’t cheap. But think of it as investing in your art and business. The leap in image quality can open doors to new opportunities and clients. Plus, there’s no beating the satisfaction of nailing those stunning, detailed shots.
2. Master the Art of Minimum Focusing Distance
Diving deeper into the world of macro food photography, there’s a concept that’s as crucial as your choice of lens: the Minimum Focusing Distance (MFD). It’s the closest you can get to your subject while still keeping it in sharp focus. Understanding and mastering this can elevate your macro shots from good to breathtaking.
Why MFD Matters
- Closer = Better: The closer you can get to your subject, the more you can reveal the intricate details that make macro photography so compelling.
- Precision in Focus: Knowing your lens’s MFD ensures that you’re always within the sweet spot for achieving crisp, detailed shots.
Getting to Grips with MFD
- Check Your Lens Specs: Start by checking the specifications of your macro lens. The MFD will be listed there, giving you a clear starting point.
- Practice Makes Perfect: Spend time experimenting with your lens’s MFD. It’s about getting a feel for how close you can get while maintaining clarity.
Did you know?
The 100mm macro lens has a minimum focusing distance of about 30 cm (12 inches), allowing photographers to achieve true 1:1 magnification while still keeping enough distance to comfortably arrange lighting and composition.
The Impact of MFD on Your Photography
Understanding the MFD of your lens is more than just a technical exercise. It’s about pushing the boundaries of what’s possible in macro food photography. By getting as close as the MFD allows, you can capture textures, colors, and details that would otherwise go unnoticed.
Mastering the MFD is a game-changer in macro photography. It’s more than just about technical precision; it’s about bringing your creative vision to life, one close-up at a time.
3. Harness the Power of Manual Focus
In the realm of macro food photography, Autofocus can sometimes feel like trying to thread a needle with a rope. Manual Focus, on the other hand, offers the precision and control you need to capture those mouth-watering details.
Why Manual Beats Auto:
- Auto-focus struggles with the Shallow Depth of Field in macro shots.
- Manual Focus allows for pinpoint accuracy, especially in complex compositions.
Pro Tip
Use Live View Mode on your camera to zoom in on your subject. This will help you fine-tune the focus manually for razor-sharp results.
4. Choose Your Subjects Wisely


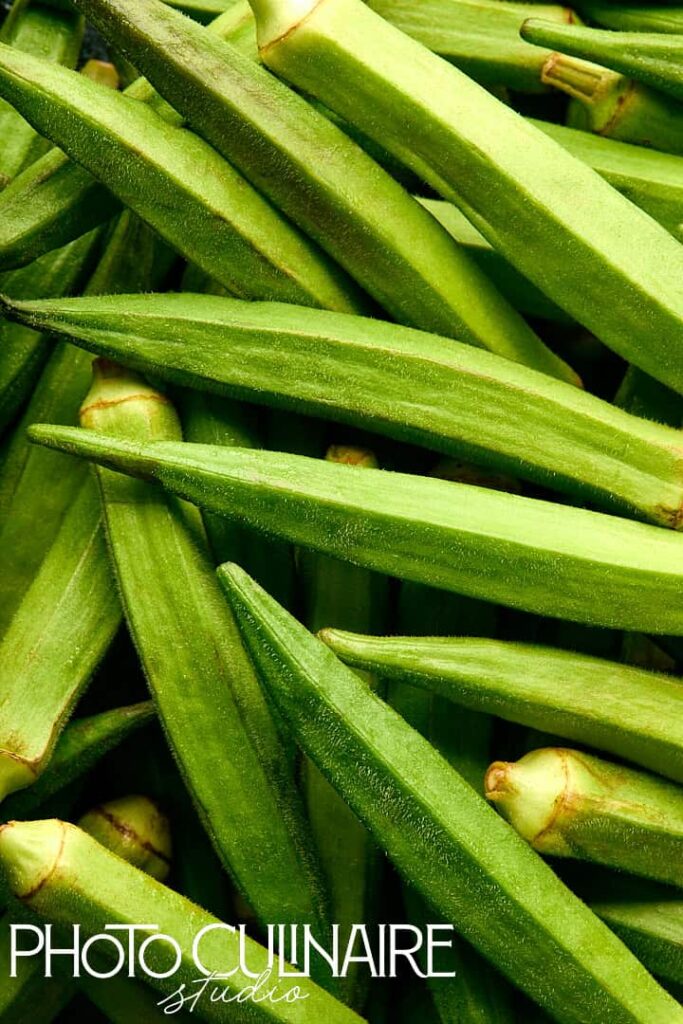
Selecting the right subject is pivotal in macro food photography. Not everything looks as captivating up close as it does from afar. The key? Look for texture, color, and patterns. These elements can transform a simple shot into a visual feast.
Tips for Picking the Perfect Subject:
- Texture Talks: Foods with interesting textures, like the textured surface of a loaf of bread, or the delicate patterns on fruits stand out.
- Color is Key: Vibrant colors can make your images pop. Think about the rich red of a strawberry, or the deep green of basil leaves.
- Patterns Play: Natural patterns, like the intricate designs of romanesco broccoli, add a mesmerizing element to your shots.
Some of my favorite subjects for macro food photography:
- Vegetables
- Fruits
- Spices and Herbs
- Coffee Beans
- Grains and Pulses
- Carbonated Drinks
- Ice Cubes
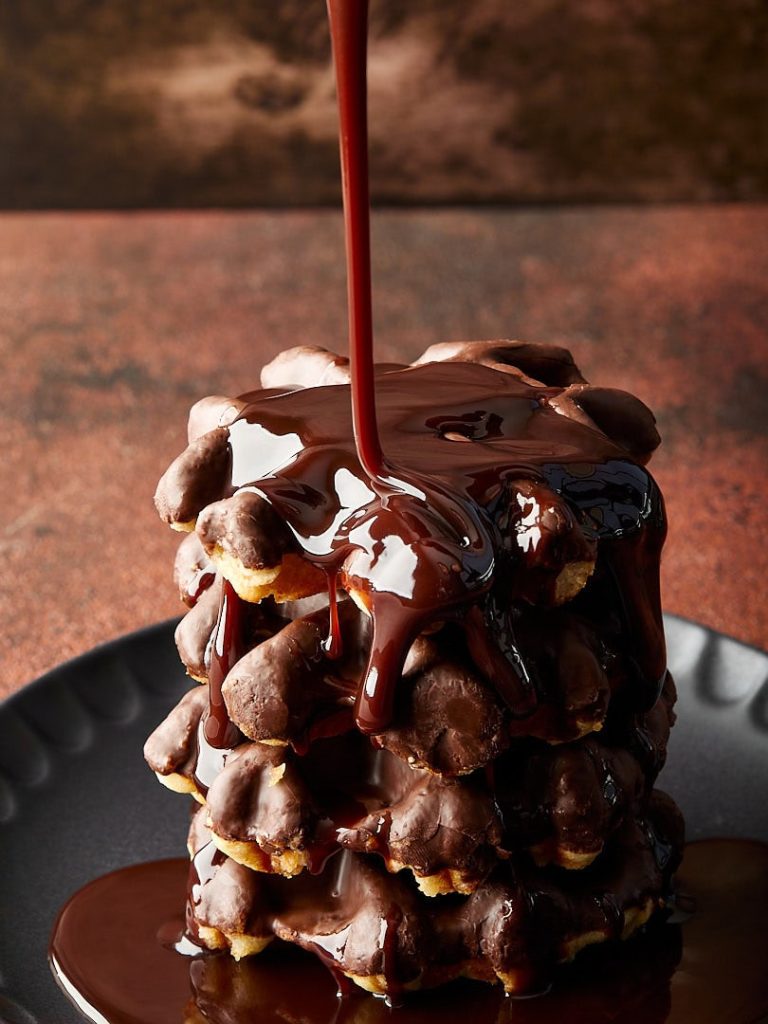
- Cakes and Biscuits
- Desserts
- Pasta
5. Stability with a Tripod
A tripod is your best friend in macro food photography. It’s not just about avoiding camera shake; it’s about precision and the ability to fine-tune your composition.
Why a Tripod is Non-Negotiable:
- Sharpness: Even the slightest movement can blur a macro shot. A tripod keeps your camera steady for crystal-clear images.
- Composition: With a tripod, you can meticulously adjust the framing of your shot, ensuring every detail is exactly where you want it.
6. Lighting: The Make or Break
Lighting in macro food photography can dramatically affect the mood and texture of your images. It’s about finding the right balance, and using light to enhance the natural beauty of your subject.
Lighting Tips for Beginners:
- Natural Light: Start with natural light for a soft, authentic look. A large, well-lit window can be a good light source for beginners.
- Diffuse Your Light: Harsh shadows can obscure details. Use diffusers (even a sheer curtain can work) to soften the light.
- Play with Angles: Experiment with light angles to highlight textures and details. Sometimes, moving your light source just a few inches can make a world of difference.
7. Embrace the Beauty of Backlighting Technique

Backlighting isn’t just a technique; it’s an art form that can elevate your macro food photography from great to unforgettable. It’s about using light to paint your subject in a way that highlights its best features.
- Why Backlighting? It creates a luminous effect, making translucent subjects glow, and solid subjects stand out with enhanced textures.
- How to Achieve It: Place your light source behind your subject. Experiment with the angle to find the sweet spot where the light just kisses the edges of your subject, creating a halo effect.
Remember
The key to successful backlighting is experimentation. Each subject will interact with light differently, so don’t be afraid to play around until you find the perfect setup.
8. The Critical Role of Depth of Field
Depth of field (DoF) is the canvas on which you paint your macro food photography masterpieces. It’s what allows you to isolate your subject, drawing the viewer’s eye directly to the heart of your image.
Understanding DoF:
- Shallow DoF: Use a wide Aperture (low f-number = f/2) to blur the background and focus on a specific part of your subject.
- Deep DoF: A smaller Aperture (high f-number = f/16) keeps more of your scene in focus, useful for capturing every detail of your subject.
Finding Your DoF Sweet Spot:
- Experiment with Aperture Settings: Start wide and narrow down to find the perfect balance for your shot.
- Consider Your Subject: Decide what story you’re trying to tell. Do you want to highlight a single detail or showcase the subject in its entirety?
Pro Tip
Use a tripod and Manual Focus in tandem with DoF adjustments for ultimate control and precision in your macro food photography.
9. Dial In Your ISO for Perfection
In macro food photography, ISO isn’t just a setting; it’s a critical decision that impacts the clarity, sharpness and mood of your images. Keeping your ISO as low as possible is the golden rule to avoid noise and ensure your photos are crisp.
ISO Insights:
- Low ISO for Less Noise: Stick to the lowest ISO setting your lighting conditions allow. This ensures the smoothest textures in your shots.
- Adjust with other settings of the Exposure Triangle, Not ISO: Instead of cranking up the ISO in low light, try adding more light to your scene by using a wide Aperture (low f/number) or use a long Shutter Speed with your camera on a tripod.
Pro Tip
Try to keep your ISO at 100 or 200 whenever possible. Although noise can be reduced in post-processing, capturing the cleanest image in-camera will always produce better results.
10. Flash: Your Secret Ingredient
Artificial light can transform your macro food images. A well-used flash can illuminate details and textures in ways that natural light alone cannot match.
Flashing Forward:
- Subtlety is Key: Use a diffuser or bounce the flash to avoid harsh shadows and highlights.
- Freedom with Flash: Flash gives you freedom to shoot any time of the day unlike natural light.
11. The Magic of Manual Mode
Mastering manual mode settings gives you unparalleled control over the look and feel of your macro food photographs. It’s about balancing the holy trinity of photography: aperture, shutter speed, and ISO, to create the perfect shot.
Exposure Excellence:
- Aperture Priority: Start with your Aperture to control the Depth of Field; this is crucial in macro photography to ensure your subject stands out.
- Shutter Speed Savvy: Choose a shutter speed fast enough to avoid camera shake or motion blur. In macro photography, even small movements can affect sharpness. When shooting handheld with a 100mm lens, a shutter speed of around 1/100 second or faster is a good starting point.
- ISO Integration: Keep it as low as possible, adjusting your Aperture and Shutter Speed to compensate for low light conditions.
Pro Tip
In macro photography, even the smallest adjustment can have a big impact. Use Manual Mode to fine-tune your settings for each unique shot.
12. Composition and Framing: The Art Within the Art
Composition in macro food photography isn’t just about what you include; it’s about what you choose to leave out. Framing your subject in a way that tells a story or evokes an emotion can turn a simple photo into a masterpiece.
Compositional Considerations:
- Rule of Thirds: Place your subject along the lines or intersections for a naturally appealing composition.
- Leading Lines: Use natural lines in your food or setup to guide the viewer’s eye to the focal point.
- Negative Space: Don’t be afraid of empty space. It can help your subject stand out and add a sense of elegance to your photo. If you want more creative ideas, explore these negative space tips for food photography.
Remember
Composition is subjective. Trust your instincts and shoot from different angles to find the most compelling framing.
13. The Importance of Background Selection

The right background can make your macro food photography pop by adding depth, context, or a splash of complementary color. It’s not just about what’s in focus; the out-of-focus elements play a significant role, too.
Background Basics:
- Simplicity Shines: A simple, uncluttered background ensures your subject remains the star of the show.
- Texture and Color: Use backgrounds with subtle textures or colors that complement your subject without overwhelming it.
Pro Tip
Keep a collection of backgrounds at hand. Different textures, colors, and materials can dramatically change the mood of your photographs.
14. Patience and Practice: The Photographer’s Virtue
Perhaps the most underrated tip in macro food photography is the need for patience. The perfect shot rarely comes easy. It’s often the result of trial, error, and a lot of patience.
Patience Pays Off:
- Experiment: Try different settings, compositions, and lighting. Each attempt teaches you something new.
- Take Breaks: If you’re getting frustrated, step away for a moment. A fresh perspective can make all the difference.
Pro Tip
Practice regularly! The more you shoot, the better you’ll become at anticipating what works best in various situations. Great photography happens at the intersection of preparation and patience. Give yourself the time to experiment and learn.
15. Focus Stacking: A Path to Ultimate Sharpness
Focus stacking in macro food photography is like having your cake and eating it too. It allows you to achieve front-to-back sharpness in your images, a feat often challenging with the Shallow Depth of Field inherent in macro lenses.
Stepping into Focus Stacking:
- What Is It? Focus stacking involves taking several photos of the same subject at different focus points and combining them in post-processing to create a single image with greater apparent depth of field.
- Why Use It? It allows more of your subject — from front to back — to appear sharp, which is especially useful in macro food photography where depth of field is very limited.
Pro Tip
Use a tripod to keep your camera steady, and ensure the images align perfectly during the stacking process. Software like Adobe Photoshop can automate the stacking for you, making it less daunting.
16. Beautiful Food Equals Beautiful Photos

For food photography, the allure begins with selecting high-quality ingredients. Fresh fruits and vegetables, with their vibrant colors and textures, serve as the foundation for striking images.
Selecting Quality Ingredients:
- Why It Matters: Fresh, high-quality ingredients have unbeatable colors and textures that elevate your photographs.
- How to Enhance: Lightly washing or misting produce can highlight their natural freshness and appeal.
17. Pay Attention to the Plane of Focus
The plane of focus is the area in your image that appears the sharpest. In photography, this plane runs parallel to your camera’s sensor. In macro photography, where depth of field is very shallow, understanding the plane of focus helps you position your camera and subject so that the most important details remain sharp.
Significance of Plane of Focus:
- Why It Matters: Aligning the plane of focus with the most important part of your subject helps ensure that key details remain crisp and well defined.
18. Use a Large Light Source
A large light source, such as a window or a softbox, can softly illuminate your subject, reducing harsh shadows and enhancing the food’s natural colors and textures. If natural light is your choice, a translucent curtain can serve to soften it further.
Lighting Your Subjects:
- Why a Large Source? It provides even, soft lighting that can make your food look more appealing.
- Softening Natural Light: A translucent curtain can diffuse sunlight, creating a gentle and flattering light for food photography.
19. Eliminate Camera Shake with a Remote Shutter Release
A remote shutter release, or your camera’s two-second timer, can be invaluable tools in macro food photography. They allow you to take photos without physically touching the camera, minimizing the risk of camera shake and ensuring sharper images.
Avoiding Camera Shake:
- Remote Shutter Release: Allows for triggering the shutter without direct contact, ideal for achieving sharpness.
- Two-Second Timer: A simple alternative that provides a brief delay to let any vibration settle before taking the photo.
20. Image Stabilization Tips
When shooting on a tripod, it’s usually recommended to turn off image stabilization on your lens to prevent unwanted micro-adjustments that could cause blur. When shooting handheld, however, enabling Vibration Reduction or Image Stabilization can help reduce camera shake and improve sharpness.
Managing Image Stabilization:
- On a Tripod: Switch off image stabilization to prevent unnecessary corrections that could blur your shot.
- Shooting Handheld: Activate Vibration Reduction to stabilize the image and reduce blur from hand movements.
21. Post-Processing: The Final Touch


Post-production gives life to your food images, and makes them look ultra-professional. Post-processing is not about fixing mistakes; it’s about enhancing the beauty already captured in your macro food photography. A few subtle tweaks can elevate a good photo to a great one.
Editing Essentials:
- Color Correction for Appetite Appeal: Ensure your colors are true to life. Food needs to look appetizing, and accurate color representation is key.
- Sharpening for Detail: Apply sharpening judiciously to bring out the textures and details without introducing noise.
Pro Tip
Use editing software to apply local adjustments, like brightening shadows or enhancing highlights, to draw attention to the star of your shot — the food.
Conclusion: Unleash Your Creative Genius in Macro Food Photography
Now that we’ve covered the essentials, it’s time to experiment and make these ideas your own. Play with color, try different compositions, and see what sparks your creativity. Macro food photography allows you to highlight details that often go unnoticed, turning everyday ingredients into visually striking images. The tips shared here are meant to give you a strong starting point as you continue developing your macro photography skills.
The real growth comes not from rigidly following guidelines, but from experimenting, staying curious, and enjoying the creative process. With each image, you’re not just capturing food — you’re telling a story through light, texture, and detail.
I’m Eager to Hear Your Macro Food Photography Stories:
Macro food photography is full of creative possibilities. I’d love to hear about your experience with macro food photography. What subjects do you enjoy photographing the most? Share your thoughts, ideas, or tips in the comments below.
. . . . .