Want food photos that practically jump off the screen? Many photographers struggle to create images with that elusive pop. It’s tricky translating three-dimensional food onto a two-dimensional surface. The secret? Mastering light direction, especially sidelight. When you’re showcasing intricate textures and patterns, sidelight is your ultimate ally. It adds depth, atmosphere, and a richness that other lighting setups simply can’t match.
Jump to:
Sidelight is a versatile tool for any food photographer. It works in almost any situation, making it an essential skill to have in your toolkit. Plus, it’s relatively easy to manipulate, giving you a lot of creative control.
What Exactly is the Sidelight Technique?
Sidelight, a technique borrowed from master painters like Rembrandt and Vermeer, is all about creating contrast and definition. It’s about sculpting your subject with light and shadow. Imagine a light source positioned to the left or right of your subject. One side is bathed in light, while the other falls into shadow. This simple setup can dramatically enhance your food photos.
When you look through your camera’s viewfinder, you’ll clearly see the light originating from either the left or the right. This directional light is key to achieving the sidelight effect. It’s a powerful tool for emphasizing details, and creating a sense of depth.
Sidelight is a fantastic choice for food photography, especially for taller or stacked subjects. Think towering burgers, layered cakes, or a vibrant stack of pancakes. The shadows created by sidelight add a touch of drama, and intrigue. You can soften these shadows with reflectors for a gentler look, or leave them as they are for a more dramatic, moody feel. It’s all about control.
Equipment Placement & Camera Angle for Sidelight
Sidelight is positioned at a 90-degree angle to your camera, not 180. A 180-degree angle would be backlighting. Think of it this way: your camera is facing forward, and the light is coming from directly to its left or right. This creates that distinct light-and-shadow contrast we’re after.
Two crucial elements define sidelight:
- Your main light source: It illuminates your subject from the side. This is non-negotiable.
- Your camera position: It faces the opposite side of the light source. If the light is on the left, you shoot from the right, and vice versa.
This setup is a workhorse in food photography. It’s incredibly versatile, and works wonders with a wide variety of subjects. From a sky-high stack of pancakes, to a juicy burger, or a crisp, fresh salad, sidelight adds depth and dimension that makes your images truly captivating. The shadows created by sidelight are key to achieving this effect. They give form, and volume to your subject, making it look almost three-dimensional.
Benefits of Sidelight in Food Photography
Sidelight is a game-changer for food photography. It does more than just illuminate your subject; it sculpts it. By highlighting shapes, and emphasizing textures, sidelight adds a unique mood, and atmosphere to your images. The contrast created by the light and shadow play is essential for adding depth and drama.
Think about it: the areas of darkness, and shadow add a sense of mystery and intrigue. Even the smallest details cast pronounced shadows, making them stand out. This is because sidelight wraps around your subject, effectively separating it from the background. This separation creates a sense of dimensionality, preventing your food from looking flat and lifeless.

Here’s a quick recap of the benefits:
- Creates depth: Sidelight adds a three-dimensional feel to your food.
- Highlights texture: From the crispness of a cookie to the juicy texture of a steak, sidelight accentuates it all.
- Enhances dimension: Food no longer looks flat; it has form, and volume.
- Sets a dramatic tone/ambiance: Sidelight can create a moody, and evocative atmosphere.
- Defines and highlights a food’s features: It draws attention to the most appealing aspects of your subject.
Pro Tip
When in doubt, go with sidelight. It’s a reliable and versatile technique that can elevate your food photography to the next level. It simplifies your lighting decisions, and helps you create stunning images with minimal fuss.
When to Use Sidelight for Food Photography
Sidelight is your go-to lighting technique in several situations. It’s particularly effective when you need to:
- Emphasize textures: Sidelight excels at bringing out the texture of food. Think crispy fried chicken, flaky pastries, or desserts with intricate toppings. The shadows cast by sidelight accentuate surface details like grill marks, frosting swirls, or the rough texture of bread crust. It adds visual interest, and makes the food look more appealing. It creates drama by playing with light and shadow.
- Photograph the interplay of highlights and shadows: Sidelight creates the longest and most distinct shadows. It’s not just the size of the shadow, but also the contrast between the bright and dark areas that makes sidelit photos so compelling.
- Create horizontal shadows: Sidelight is perfect for producing long, horizontal shadows that enhance composition, and add depth to the scene. These shadows can lead the viewer’s eye through the image, and create a sense of perspective.
- Use hands or human elements in the scene: Sidelight works beautifully when incorporating hands into your food photos. Position the hands opposite the light source so that both the hands and the food are illuminated, creating beautiful highlights.


- Photograph wide table scenes and complex compositions: When shooting large compositions like a feast or a buffet table, sidelight provides even illumination while allowing you to easily adjust the shadows as needed.
When Not to Use Sidelight for Food Photography
While sidelight is incredibly versatile, there are times when it’s not the best choice. Avoid sidelight when:
- You want to minimize shadows: If you’re aiming for a bright, airy look with minimal shadows, sidelight can be too dramatic.
- Photographing flat, smooth surfaces: Sidelight can accentuate imperfections, and create harsh shadows on very smooth foods, making them look less appealing. In these cases, backlighting may be a better option for a softer look.
- Even lighting is desired: If you need uniform light distribution across the food with minimal shadows, sidelight should be avoided. Front lighting or a diffused light source might be more suitable.
- Highly reflective surfaces are present: Sidelight can create distracting reflections, highlights, and hotspots on reflective surfaces like glassware or metal.
- Shooting small food items: On very small items, the shadows created by sidelight can overwhelm the subject and obscure important details.
Soft or Hard Sidelighting: Setting the Mood
Another crucial decision when using sidelight is choosing the quality of light: soft or hard. This choice dramatically impacts the mood and tone of your final image. The quality of light refers to whether it’s direct and harsh or diffused and soft. Also, monitoring exposure using the histogram can help ensure highlights and shadows remain balanced.
Soft and Diffused Sidelight
This creates a flattering, airy, and vibrant look — perfect for a light and airy mood. It minimizes harsh shadows, and creates a gentle transition between light and dark areas.
- How to achieve it? Use a diffuser between your light source and the subject (like a softbox or diffusion panel). Placing a reflector opposite the light source will further soften the shadows, and create a brighter, more even illumination.
Direct and Harsh Sidelight
This creates high-contrast images with dramatic effects — ideal for a dark and moody atmosphere. It emphasizes shadows, and creates a more dramatic, edgy feel.
- How to achieve it? Use a direct, undiffused light source. Removing the reflector or using a black fill card to absorb light will further accentuate the shadows, and create a more dramatic look. This makes the shadows deeper, and the highlights brighter, increasing the contrast.
Remember
Choosing between soft and hard sidelight is all about the mood you want to convey. Soft light is gentle and inviting, while hard light is dramatic and intense. Consider the subject and the overall message you want to communicate with your image.
Best Food Photography Subjects for Sidelight


Sidelight is incredibly versatile, and works well for almost any food photography setup. That’s why it’s a favorite among many photographers, and a fantastic starting point for beginners.
I particularly love using sidelight for foods with pronounced textures, layered and tall subjects, and straight-on shots, where showcasing the front of the food is key. The shadows created by sidelight beautifully accentuate details, adding depth and dimension.
Here are some specific food examples that shine with sidelight:
| Tall, Layered Subjects | Cakes, pancakes, burgers, sandwiches — anything with height and layers benefits from the depth sidelight provides. |
| Baked Goods | Croissants, bagels, sourdough bread, and cookies with intricate designs all look fantastic, with sidelight highlighting their textures. |
| Grilled Meats | Steak, burgers, and chicken breasts with distinct grill marks are enhanced by the shadows sidelight creates. |
| Roasted Vegetables | Carrots, Brussels sprouts, and potatoes showcase their roasted textures beautifully with sidelight. |
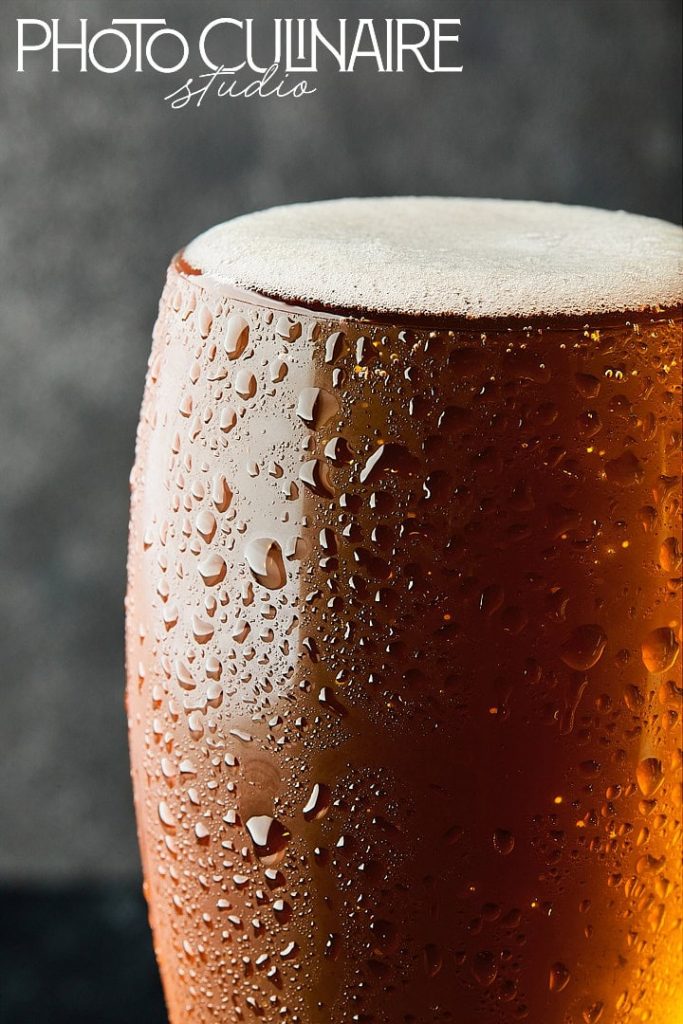
| Drinks | Smoothies, cocktails, and other beverages can look stunning with sidelight, but be mindful of highly reflective surfaces like glass. |
| Fruits with Unique Textures | Berries, citrus peels, and dragonfruit showcase their vibrant colors and textures under sidelight. |
| Crispy Fried Foods | French fries, onion rings, and chicken wings practically beg for sidelight to accentuate their crispy exterior. |
| Seafood | Salmon fillets with skin and grilled shrimp look incredibly appetizing, with sidelight highlighting their textures. |
Important Considerations When Using Sidelight
- Angle of Light: Adjust the angle of your light source to control the intensity of the shadows. A lower angle creates more dramatic shadows, while a higher angle produces softer shadows. Experiment to find what works best for your subject.
- Reflectors: Use reflectors to fill in shadows if needed, and maintain balanced lighting. This can prevent the shadows from becoming too dark, and help reveal details in the darker areas.
- Food Styling: Carefully arrange your food to ensure the textures and shadows are showcased effectively. Consider the composition, and how the light interacts with the different elements of your subject.
Ready to Light Up Your Food Photography with the Sidelight Technique?
Sidelight is a powerful tool that can instantly transform your food photography. It adds dimension, depth, and detail, capturing viewers’ attention, and making your subjects look truly irresistible. By understanding and mastering this technique, you’ll unlock a new level of creativity, and elevate your images to new heights.
Here are the key takeaways we covered:
- Sidelight creates contrast, depth, and texture.
- Position your light source 90 degrees to your camera.
- Soft light creates a gentle mood, while hard light is more dramatic.
- Sidelight works well for textured, layered, and tall foods.
- Experiment with different angles, reflectors, and styling for optimal results.
With these insights, you’re well on your way to mastering sidelight and creating stunning food photos. Remember, sidelight is all about sculpting with light and shadow. It’s about creating a visual story that draws the viewer in, and makes their mouth water.
If you’d like to go beyond the fundamentals of sidelight, explore these tips for sidelight in food photography, where I share practical ways to refine your lighting and create more impactful images.
So grab your camera, experiment with different setups, and watch your food photography come to life. What delicious stories will you tell with sidelight?
. . . . .