Diving into Manual Mode for food photography might seem like stepping into a complex dance of settings and dials. But what if I told you it’s more like unlocking a secret level in your favorite video game? A level where you have all the controls, where you can create stunning visuals. If you’ve been relying on Auto Mode, thinking Manual is too much of a leap, let’s flip that script today!
Jump to:
You’re in the right place if you’re looking to elevate your food photography from good to breathtakingly professional. We’re not just talking about taking pictures; we’re talking about crafting art with the right amount of science.
Ready to take control and let your creativity run wild? Let’s dive in and master the craft of shooting in Manual Mode for food photography like a pro.
Why Manual Mode is a Game-Changer

You’ve probably heard the buzz around shooting in Manual Mode, especially when it comes to food photography. But what’s the big deal? Let’s cut through the noise and get straight to the heart of it. Manual Mode isn’t just another setting on your camera; it’s the key to unlocking your full creative potential. Here’s why:
| Absolute Creative and Technical Control: | Imagine painting with a palette limited to just a few colors. That’s Auto Mode for you. Switch to Manual, and suddenly, you’re working with the entire spectrum. You decide the Exposure, the Depth of Field, and the balance between light and shadow. It’s about making the camera work for you, not the other way around. |
| Quality Over Convenience | Sure, Auto Mode is like the fast food of photography — quick, easy, but not always satisfying. Manual Mode, on the other hand, is the gourmet meal prepared with care. You might spend a bit more time setting up your shot, but the result? A feast for the eye — that’s exactly how you envisioned it. |
| Consistency is Key | Ever tried to recreate a particular shot only to find the results wildly different? Auto Mode makes decisions based on the scene at the moment, leading to inconsistencies. Manual Mode puts you in charge, ensuring that once you’ve found the perfect settings for your style, you can replicate that success shot after shot. |
| Mastering the Craft | There’s a certain pride that comes from knowing you’ve taken a photo that’s all you. Manual Mode might seem daunting at first, but it’s a journey worth taking. It’s not just about taking pictures; it’s about becoming a true artist in your field. |
Manual Mode cultivates a mindset of complete ownership over the photographic process. It reinforces the idea that you control the camera; the camera does not control you. This approach encourages a deeper engagement with your subject, compelling you to make deliberate choices that reflect your artistic intent.
The Essentials: Aperture, Shutter Speed, and ISO
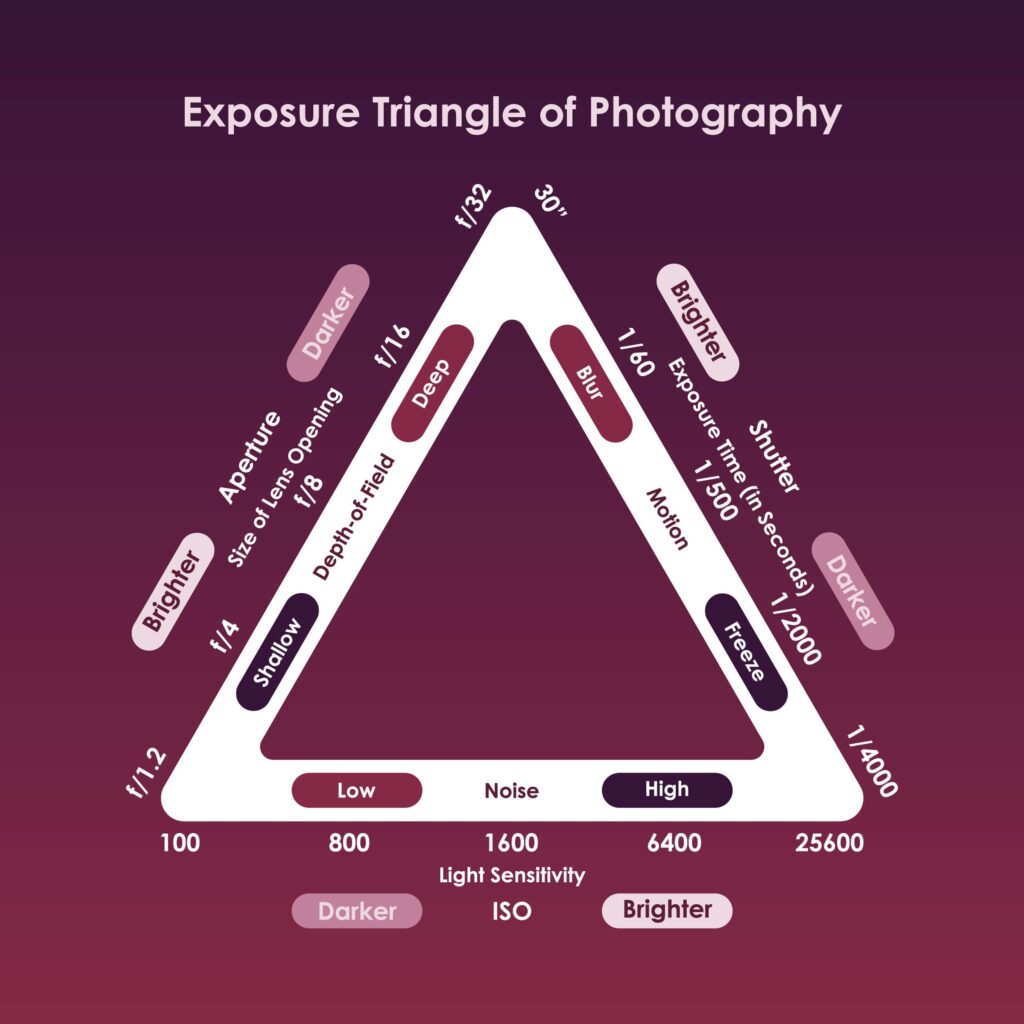
Diving into Manual Mode means getting cozy with the big three: Shutter Speed, Aperture, and ISO. These are the pillars of the Exposure Triangle, and understanding how they work together is your ticket to photographic excellence. Let’s break them down:
Aperture: Your Creative Lens
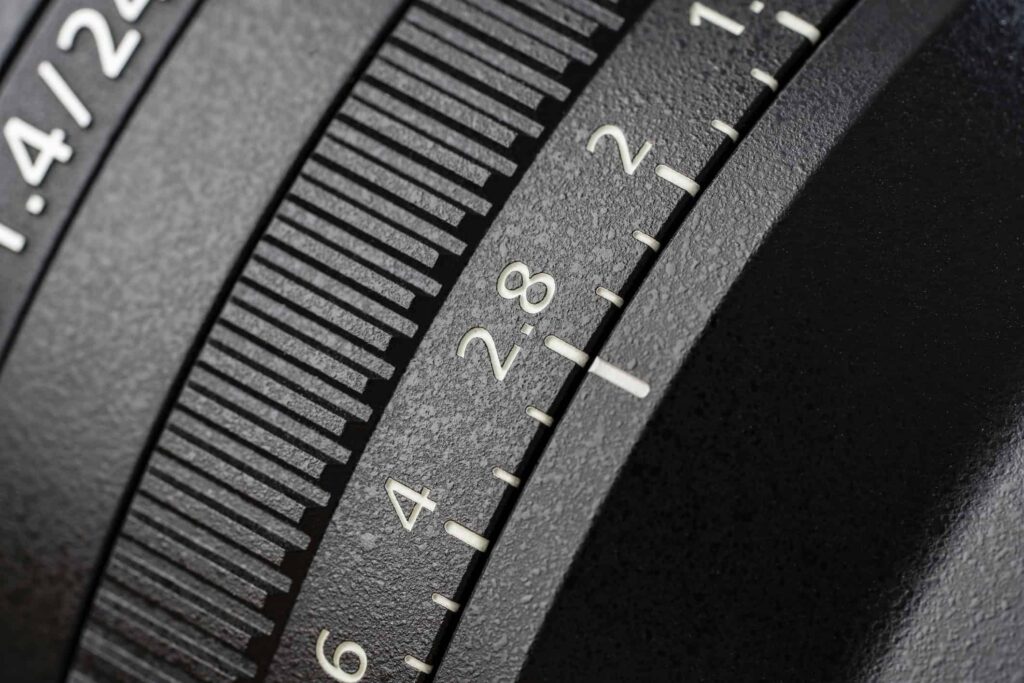
Think of Aperture as the eye of your camera. It controls how much light enters through the lens and hits the sensor. But it’s more than just a light gatekeeper; it’s your creative ally. Aperture is measured in f-stops or f-number, and playing with these settings allows you to control the depth of field — how much of your shot/scene is in crisp focus versus softly blurred.
- Low f-stops (e.g., f/1.4): These settings open the aperture wide, letting in a lot of light and creating a shallow depth of field. Perfect for those dreamy shots where your subject is in sharp focus, against a blurred background, making it pop.
- High f-stops (e.g., f/22): Close down the aperture, and you’ll let in less light but gain a deeper depth of field. This is great for capturing the full scene in focus, from the foreground to the background.

Shutter Speed: Capturing the Moment
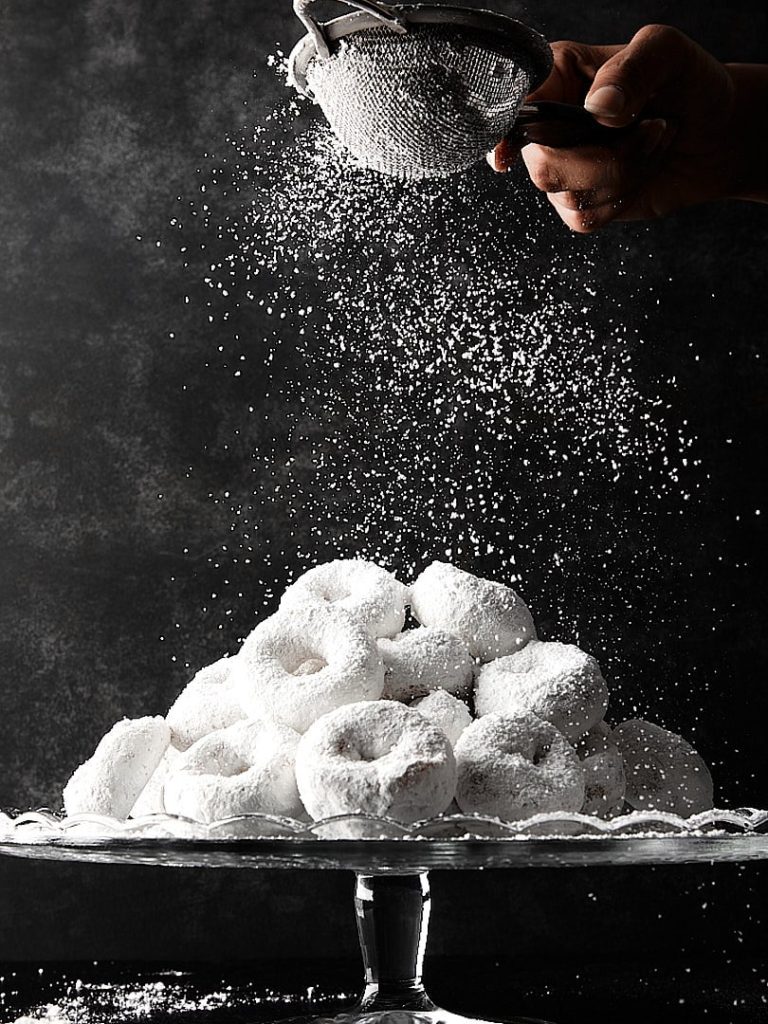
Shutter Speed is all about timing. It’s the duration your camera’s shutter remains open to expose the sensor to light. Fast shutter speeds freeze action, perfect for capturing that dynamic splash in a cocktail or the precise moment a sprinkle of powdered sugar lands on a cake.
- Fast Shutter Speeds (e.g., 1/500 s): Freeze motion with clarity and precision. No blur, just the pure, crisp moment.
- Slow Shutter Speeds (e.g., 1 second): Want to capture motion blur or convey movement? Slow it down. Just remember, with slow shutter speeds, a tripod is your best friend to avoid unwanted camera shake.
ISO: Balancing Light and Quality

ISO measures your camera’s sensitivity to light. It’s the final piece of the puzzle in achieving the perfect exposure. Higher ISO settings brighten your shot but at a cost — increased noise or grain.

- Low ISO (e.g., 100) = Ideal for well-lit conditions, keeping your images crisp and clean.
- High ISO (e.g., 3200) = Brightens your shots in low light, but beware of the noise (also known as grain). It’s all about finding the right balance for your vision.
Mastering the interplay of Aperture, Shutter Speed, and ISO allows you to take full control of your photography. It’s about making intentional choices to bring your creative vision to life. Whether you’re aiming for a soft, ethereal look or a vibrant, action-packed scene, understanding these fundamentals is your first step towards Manual Mode mastery.
Transitioning Smoothly: From Auto to Manual
Making the leap from Auto to Manual Mode can feel like a daunting step. But fear not! There’s a strategic approach to ease this transition, allowing you to gradually take more control over your camera settings. Let’s explore how you can start this journey with confidence.
Step 1: Get Comfortable with Semi-Automatic Modes
Before diving headfirst into Manual Mode, familiarize yourself with your camera’s semi-automatic settings. These modes offer a blend of automatic and manual controls, perfect for learning the ropes one step at a time.
Aperture Priority Mode (A or Av)
This mode is your creative playground for depth of field. You choose the Aperture, and the camera automatically selects the Shutter Speed to match. It’s ideal for focusing on the artistic aspect of your shots, especially when depth of field is your main concern. Use it to master how Aperture affects your images, from those creamy blurred backgrounds or bokeh to sharp, detailed scenes.
Pro Tip
Experiment with different Apertures during a single shoot to see how it changes the mood and focus of your photographs
Shutter Speed Priority Mode (S or Tv)
Here, you’re in charge of the Shutter Speed, while the camera picks the Aperture. This mode is fantastic for playing with motion — freezing it or letting it blur to convey movement. It’s particularly useful for action shots in food photography, like capturing the dynamic motion of pouring syrup or the splash of a lemon wedge in a drink.
Pro Tip
Challenge yourself with various Shutter Speeds to find the sweet spot for different types of motion, from the subtle fall of sugar to the dramatic splash of liquids.
Step 2: Practice, Practice, Practice
The key to mastering Manual Mode is practice. Start with controlled environments where you can experiment without pressure. Pay attention to how changes in one setting require adjustments in others to maintain the right exposure. This hands-on experience is invaluable and will build your confidence.
Step 3: Embrace the Exposure Triangle
As you get more comfortable with Aperture and Shutter Speed priority modes, start paying closer attention to ISO. The Exposure Triangle — Aperture, Shutter Speed, and ISO — works in harmony to create the perfect shot. Balancing these elements is the essence of shooting in Manual Mode.
Pro Tip
Keep a notebook or use a photography app to record the settings for shots you love. This log will become a valuable reference as you learn what combinations work best for different lighting conditions and subjects.
Step 4: Gradual Shift to Manual Mode
Once you’re comfortable with the semi-automatic modes and have a good grasp of how the exposure triangle affects your images, it’s time to make the shift to full Manual Mode. Start with familiar subjects and lighting conditions to ease the transition. Remember, the goal is not just to take control of your camera, but to do so in a way that brings your creative vision to life.
Transitioning to Manual Mode is a journey of discovery, filled with learning and growth. It allows you to express your creativity fully and capture the world as you see it. With patience and practice, you’ll find that Manual Mode opens up a whole new realm of possibilities in your food photography journey. So go ahead, take the plunge, and watch as your images transform from good to extraordinary.
Fine-Tuning Your Craft: Advanced Tips for Manual Mode Mastery
Now that you’ve dipped your toes into the waters of Manual Mode, it’s time to refine your skills and elevate your food photography to professional levels. Here are some advanced tips to help you fine-tune your craft and capture stunning, mouth-watering images that stand out.
- Understand Light and Its Impact
Light is the soul of photography, and mastering its use is crucial. Pay attention to the quality of light in your scene — whether it’s soft and diffused or hard and direct. Each type of light can dramatically alter the mood and feel of your images.
Pro Tip
If you are shooting in natural light, experiment with different times of day to understand how the light changes. Early morning and late afternoon offer softer, warmer light, ideal for creating a cozy, inviting atmosphere in your food photography.
- Master Manual Focus

While Autofocus is convenient, Manual Focus gives you unparalleled control over the sharpness of your images. It’s especially useful in food photography, where you might want to highlight specific details of a subject. And this is particularly helpful when shooting macro food photography, where precision focus becomes critical.
Pro Tip
Use your camera’s Live View Mode and zoom in on the area you want to focus. This will help you achieve razor-sharp precision, making your subjects pop off the screen.
- Experiment with Composition
Composition is key to creating visually appealing images. Don’t be afraid to experiment with different angles, techniques, arrangements, and props. The rule of thirds, rules of odds, layering, leading lines, and framing can all add interest, and draw the viewer’s eye to the star of the show — your hero food.
Pro Tip
Always consider the background and setting of your food shots. A cluttered background can distract from your subject, so, aim for simplicity or use elements that complement your subject.
- Play with Color and Texture
Food photography is as much about color and texture as it is about taste. Use these elements to your advantage by choosing backgrounds and props that contrast with your food, making it stand out more.
Pro Tip
Incorporate ingredients and props into your shots to add context and depth. A sprinkle of herbs, or a rustic wooden board can add texture and tell a story about the preparation of the subject.
- Continuous Learning and Inspiration
The journey to mastering Manual Mode in food photography is ongoing. Continuously seek out new sources of inspiration, whether through photography books, online courses, or by following the works of accomplished food photographers.
Embracing Manual Mode opens up a world of creative possibilities. With these advanced tips and a commitment to practice, you’ll not only master the technical aspects of your camera, but also develop a keen eye for the artistry of food photography.
Pro Tip
Set yourself regular challenges or personal projects, such as capturing the same subject in different lights or styles. This not only hones your skills, but also helps develop your unique photographic voice
Final Thoughts: Advance Your Shots, Master Manual Mode
You’ve journeyed through the ins and outs of Manual Mode, transforming from a curious learner to a confident creator. Armed with knowledge and inspiration, you’re now ready to take your food photography from good to great.
Here are the key takeaways to keep in your toolkit:
- Embrace Manual Mode for full creative and technical control.
- Understand and experiment with the Exposure Triangle.
- Practice with semi-automatic modes before diving into Manual.
- Focus on light, composition, and the story behind your subjects.
- Continuous learning and experimentation are your best tools for growth.
Remember, the path to mastery is a journey of constant learning and passion. So, keep exploring, keep shooting, and let your work do the talking. Got a story, a breakthrough, or a unique shot you’re proud of? Drop it in the comments section below. We’re all ears (and eyes!) for your experiences, tips, or any moments of inspiration you’d like to share with us.
. . . . .